Why Wireguard?
It’s 2020. Age of OpenVPN is over (atleast I hope). It’s too bulky and contains a lot of stuff that is not needed. Wireguard is simple, easy-to-setup, and fast.
The Problem
I have a dedicated server split into multiple VPS that I wanted to make available from my home network (not over the internet, mind you). This is mostly because I can access my server directly without having to expose all the services (SSH, databases, etc) to the public.
Getting to the point, I had already set-up a wireguard connection between my desktop and the servers. There are plenty of tutorials for this available over the internet so I am not going to cover that here, follow whichever you like. IMO, the default quickstart is enough to set it up.
But the thing I want to be able to do is to be able to install wireguard as a client on my wifi router itself, so I can access the server network from my home devices without having to install wireguard in all of them. Tutorials for this weren’t really available and hence this post.
Note: I keep my wireguard interface on 24x7, and I don’t want to use my server as a “classic VPN” for internet. It’s solely for connecting me to my servers. If you want to use the server as a “normal VPN”, you need to set up firewall rules to forward internet traffic server-side and set AllowedIPs to 0.0.0.0/0 client-side.
Note #2: The disadvantage is that all my home devices (atleast the ones which don’t have wireguard) masquerade as a single IP (10.10.100.100.3, see below) and thus if I want to access my home devices from the server (which is not the scope of this post, and frankly, why would you ever do that!?), I have to setup IP forwarding or add all such devices as a wireguard peer.
My IPs
It gets real confusing if I don’t mention which IP is what, so:
- I am using
10.10.10.0/24subnet for the VPSes1.10.10.10.1is the main router and gateway, which handles all networking and is a wireguard peer. The other IPs (10.10.10.2,10.10.10.3and so on) are the servers. - For the home network, I am using
10.100.100.0/24subnet, where10.100.100.1is set as the wireguard gateway. I am going to use10.100.100.3as my router’s wireguard IP. - My server’s public IP that’s listening over the internet is
x.x.x.x. (You thought I was actually gonna post it? Haha) and for wireguard it listens over the default port (51820).
You can use other local IP subnets2 too but I prefer the 10.0.0.0/8 subnet.
OpenWRT Configuration
Installing packages
Install the wireguard package and if you want to set it up over LuCI, install luci-app-wireguard. This post uses LuCI. You can install them either directly from LuCI or SSH into the box and execute:
| |
Configuring wireguard interface
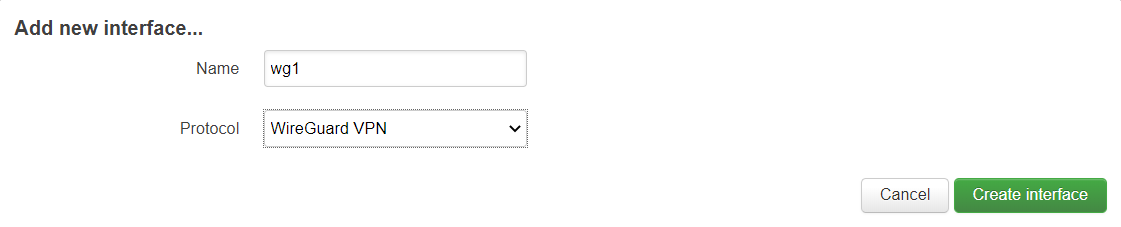
Go to Network -> Interfaces on LuCI and click on Add new interface. Select Wireguard VPN as protocol and any name you like.
 |
|---|
| I am using wg0 as interface, not wg1, keep that in mind. |
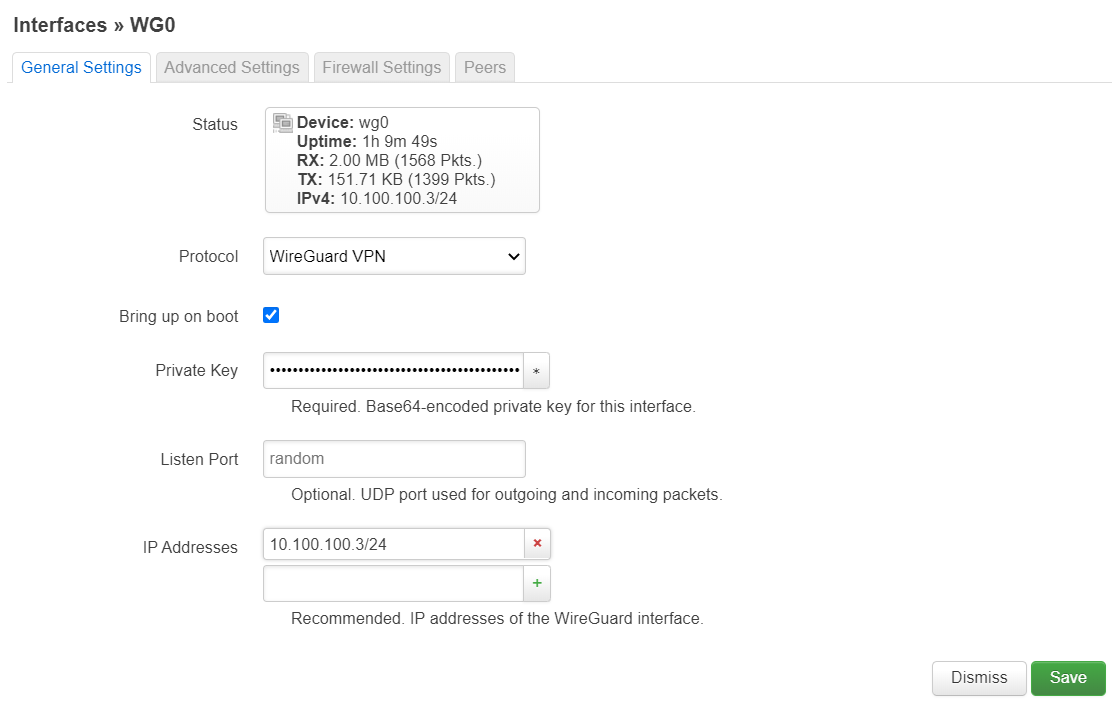
After creation, edit the interface, and in the General Settings tab, copy paste your private key3 into the field, and set your IP address.
 |
|---|
| Ez, right? |
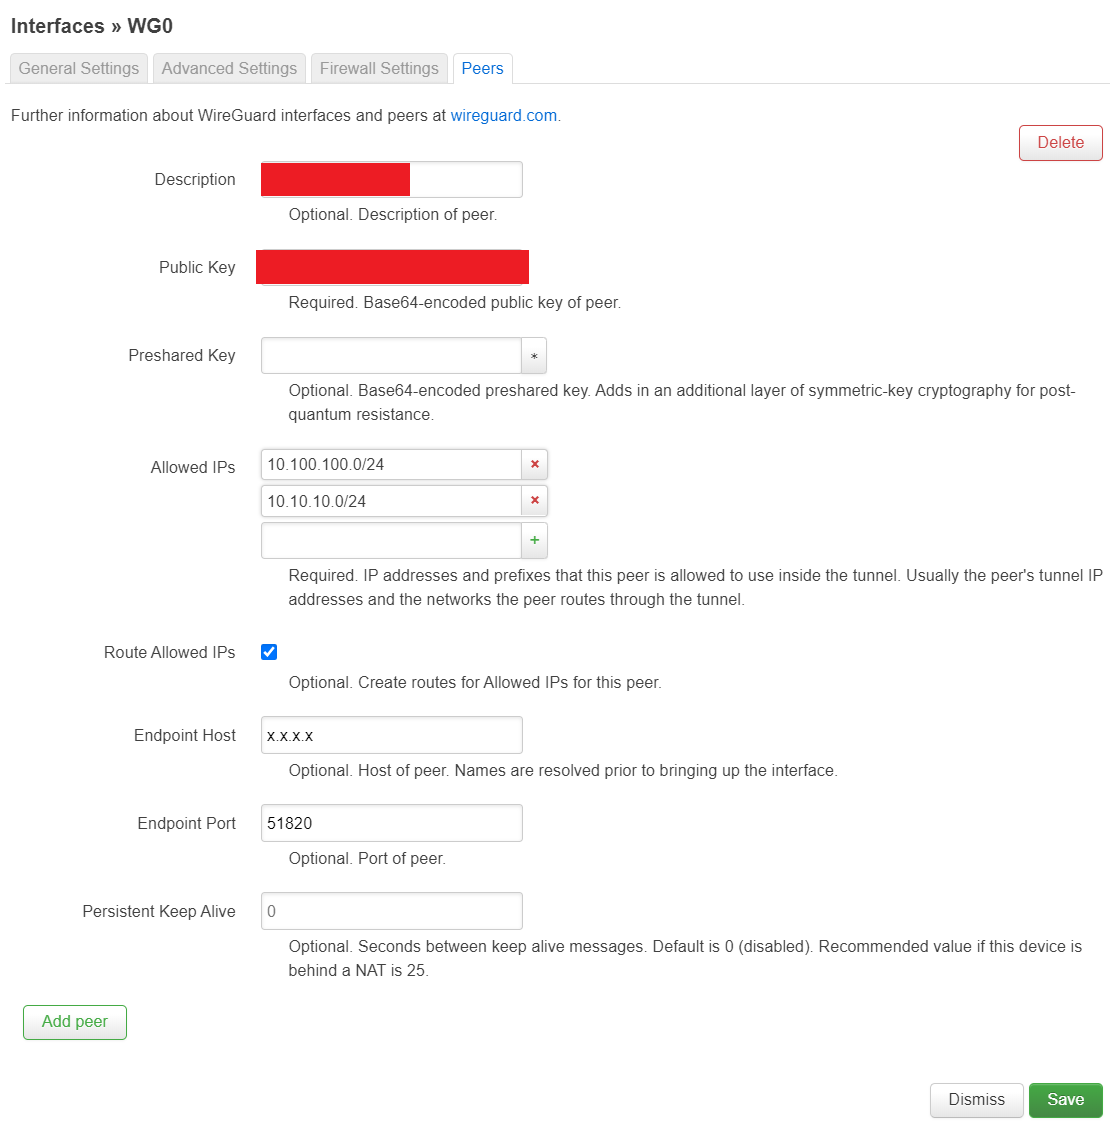
Go to Peers tab and Add peer. Add your server’s public key, set allowed IPs to whatever local IP range you are using (or 0.0.0.0/0 for entire internet over wireguard), check Route Allowed IPs checkbox, set the endpoint host and port (your server’s IP and port) and click Save. Optionally, add a description to identify the peer if you have multiple peers.
 |
|---|
| Haha, still won’t give my server’s IP |
Don’t forget to Save & Apply, and restart it if necessary!
Testing wireguard interface
Just SSH into your router and try to ping the VPSes. If you can ping, the interface works. If not… your config is broken.
Setting firewall rules
If you want to access your serversfrom your home devices and not just from the router, you need some firewall config. Thankfully, LuCI makes firewall config a breeze.
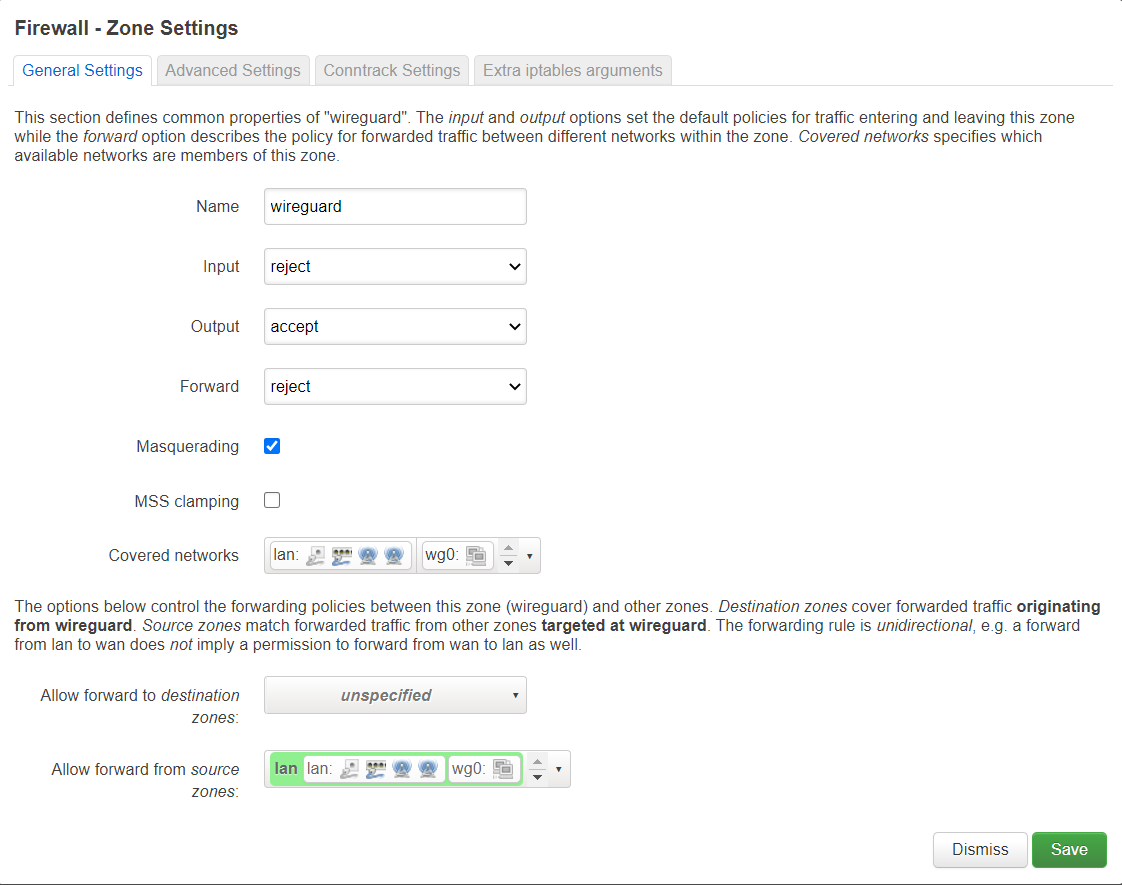
Head over to Network -> Firewall and add a new zone. Configure the input, output and forward rules however you like, I did Reject for Input and Forward, and Accept for Output. Check the Masquerading checkbox, select both LAN and wg0 (or whatever you named your interface) in Covered Networks and in the Allow forward from source zones, select LAN. Then save it.
 |
|---|
| I have no idea what MSS clamping means, can anyone explain? |
Save & Apply it, and you are done! You should be able to access your servers from any device on your router now.
Footer
If you have any questions comment below or contact me and I’ll try to help! Although keep in mind I am still learning networking and not very proficient in it.
I recently found that I was attracted to servers — I want to install a rack server in my bedroom, sadly it’s really hard to build homelabs in India ‘cause of cost :( — so I’ll probably be making more blog posts related to networking in the future!
Plural form for VPS is VPSes, right? ↩︎
Local IP ranges that you should be able to use are
10.0.0.0/8,172.16.0.0/12and192.168.0.0/24. Use an IP calculator if you want to see which IPs are available and too lazy to remember what /24 or /12 means. ↩︎Out of scope for this post cause millions of tutorials exist, go make one now. Literally single line command. ↩︎